Texture scrolling and fading with Bolt 2 & Unity Shader Graph (Part 1)
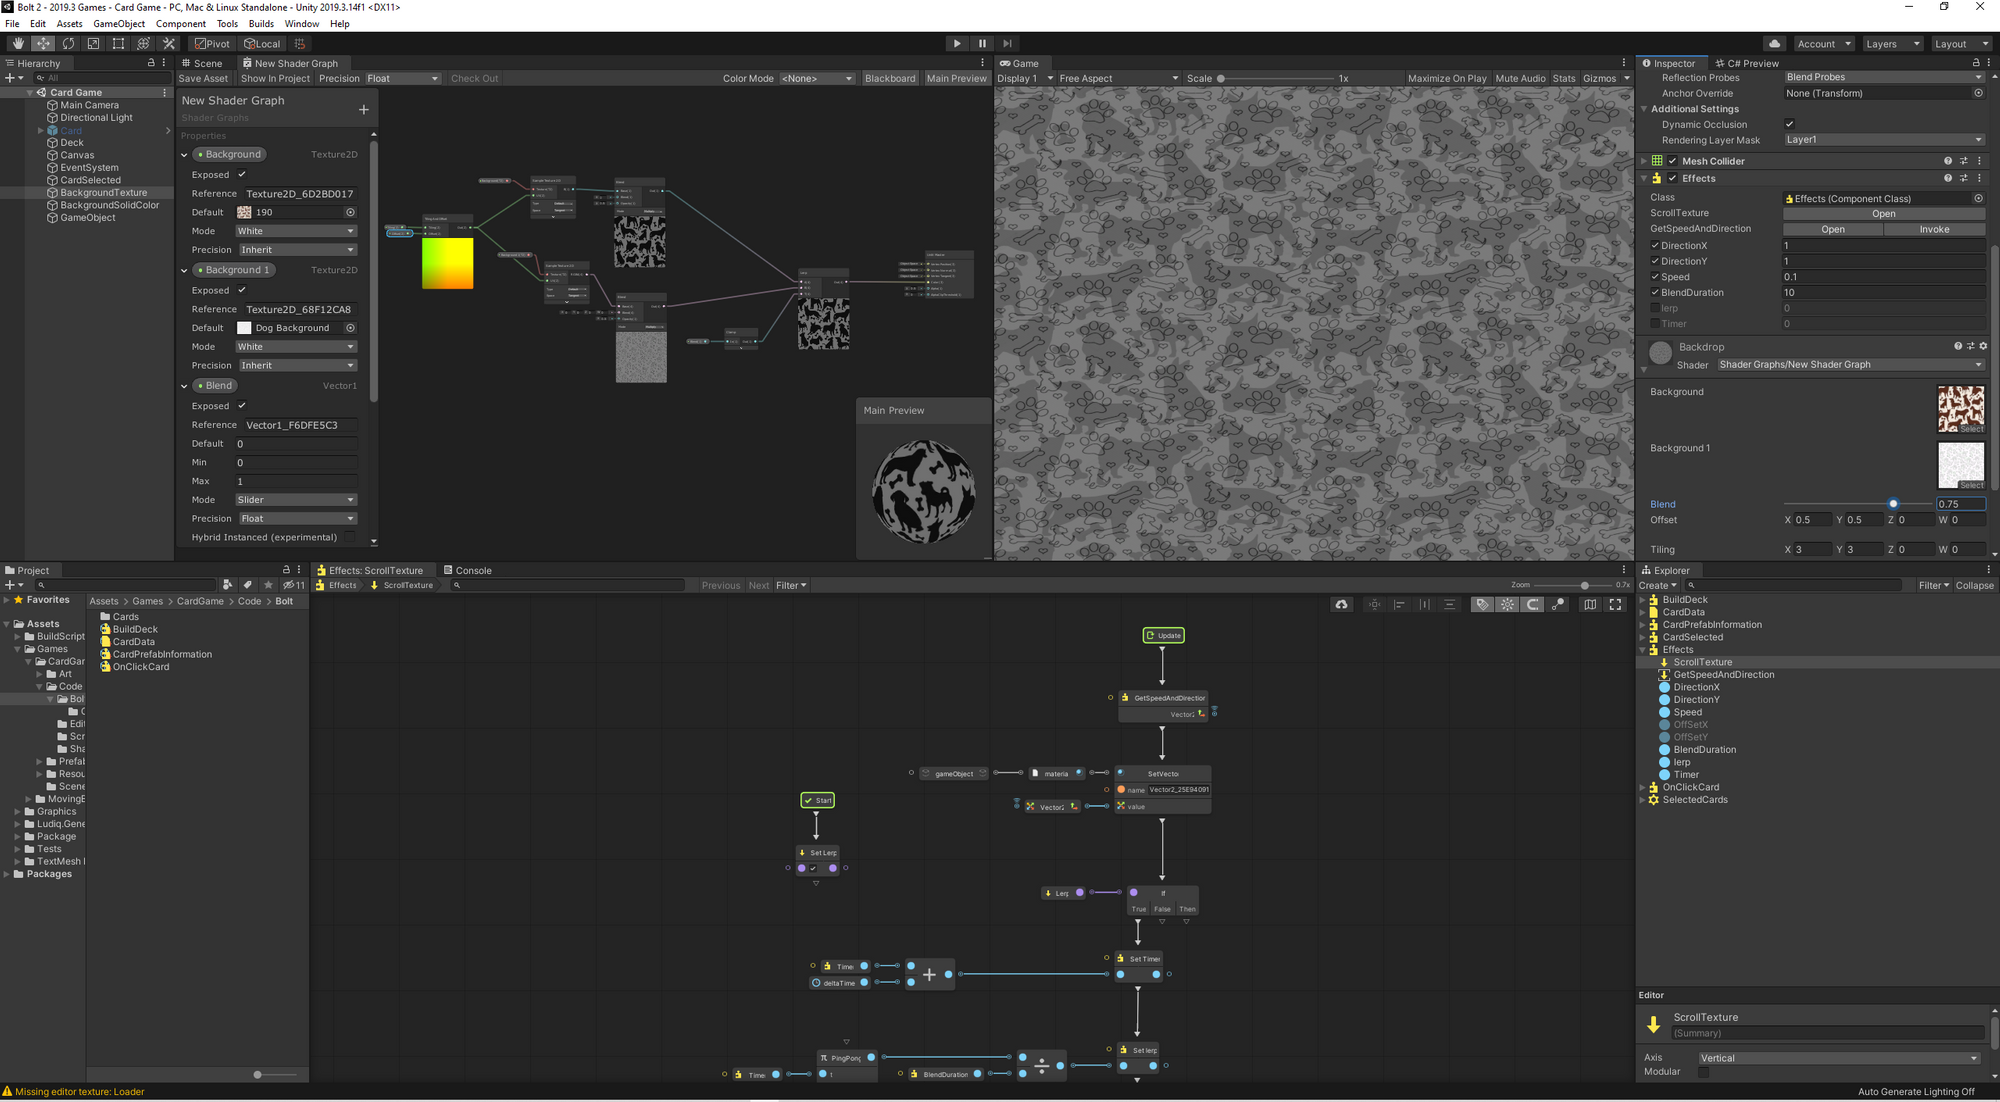
I've started to learn Bolt 2 a visual scripter for Unity. In this post i use URP, Bolt 2 and Unity's shader graph to create a scrolling texture that blends over time.
I've never made a card game before, not since way back in University and even then i didnt finish it. Bolt 2 introduced "Assets" These are a way to represent data like a scriptable object. I thought cool, good time for a card game.
This will be a super simple matching card game using Dogo's for a little bit of interest. This projects main goal is to test Bolt 2 so I'm going to keep it pretty loose.
Lets start by creating a interesting board. Some relaxing dogo backgrounds that fade in and out should do the trick. I was going to use Unity's default shader but it doesnt support blending textures. I could fade the aplha to a grey background, then replace the texture and fade the alpha back in. This seemed like a bit of a faff so i decided to create a simple blending shader in Unity's shader graph.
Result
Creating materials and shaders
Install Universal Render Pipeline and Shader Graph from the packages menu. You'll also need a copy of Bolt 2.
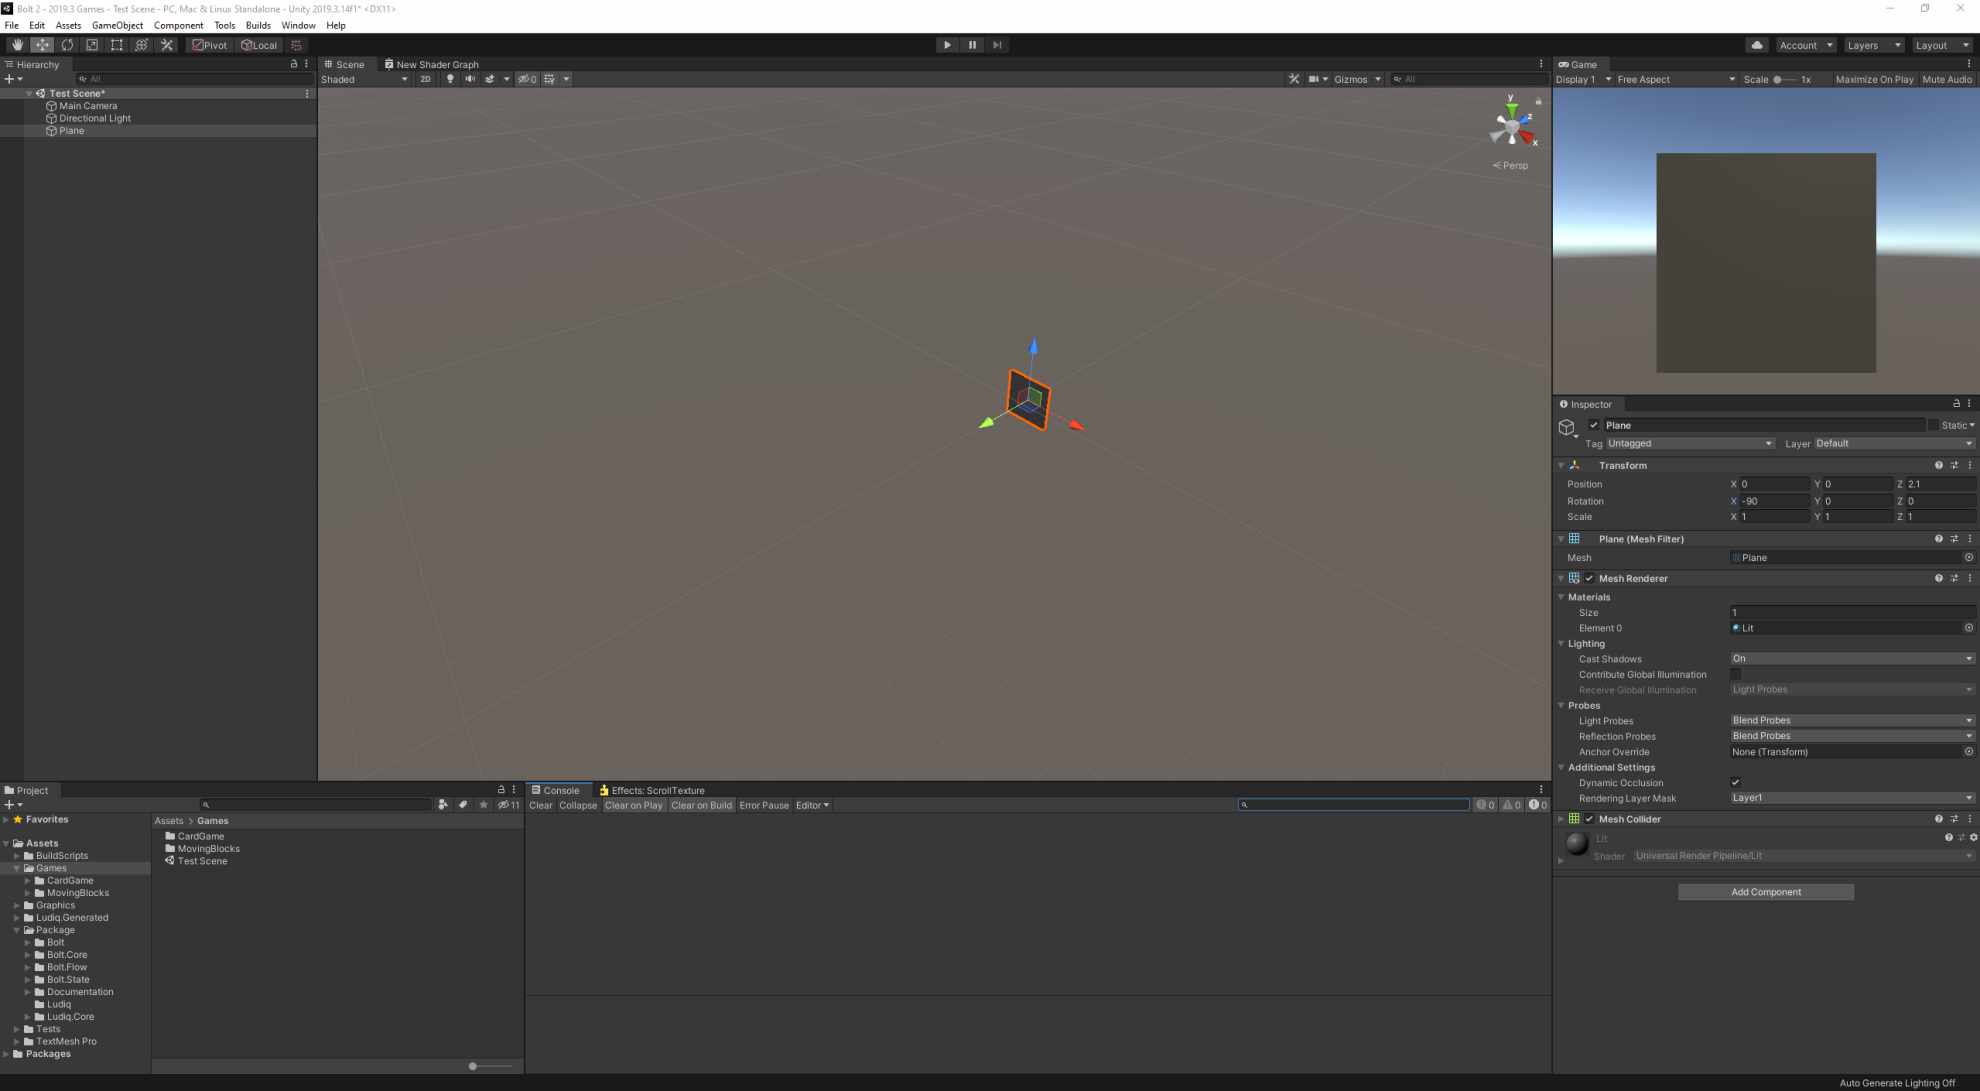
- Create a new scene. In the hierarchy, add a 3D object of type plane . Rotate it and set it up so it's visable in the camera.
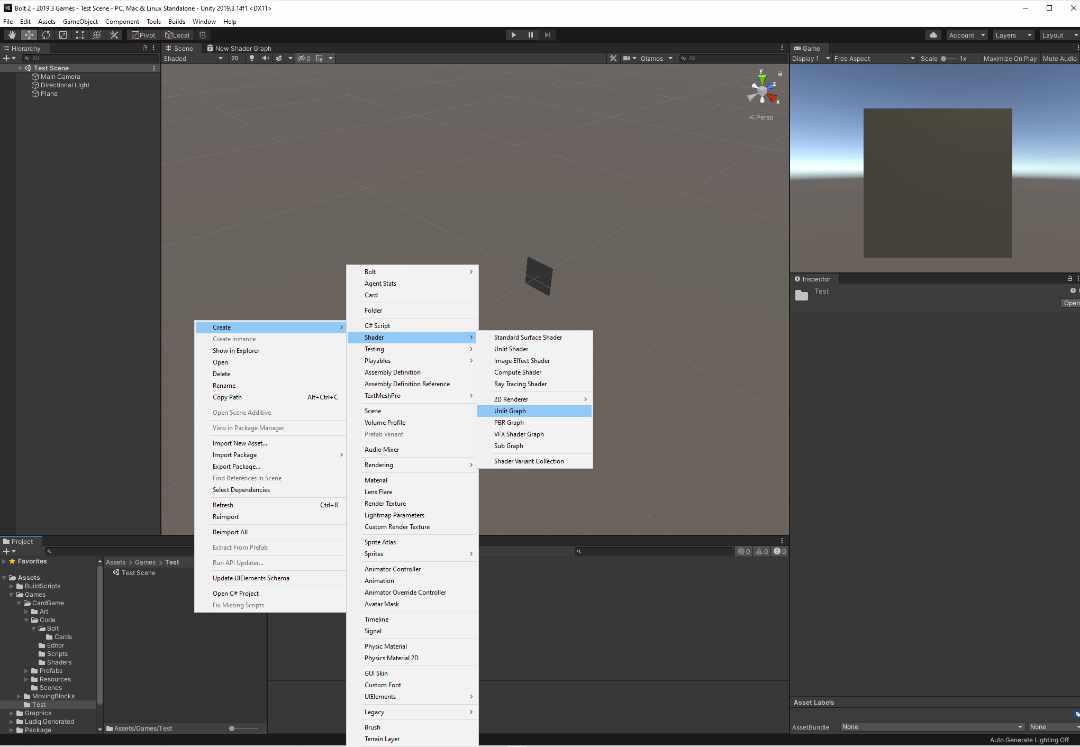
- In the Project palette, right click and select Create, Shader, Unlit Graph. Give it a name that makes scense. I used ShaderGraph - BlendingShader
- Open the Shader Graph window via the inspector.
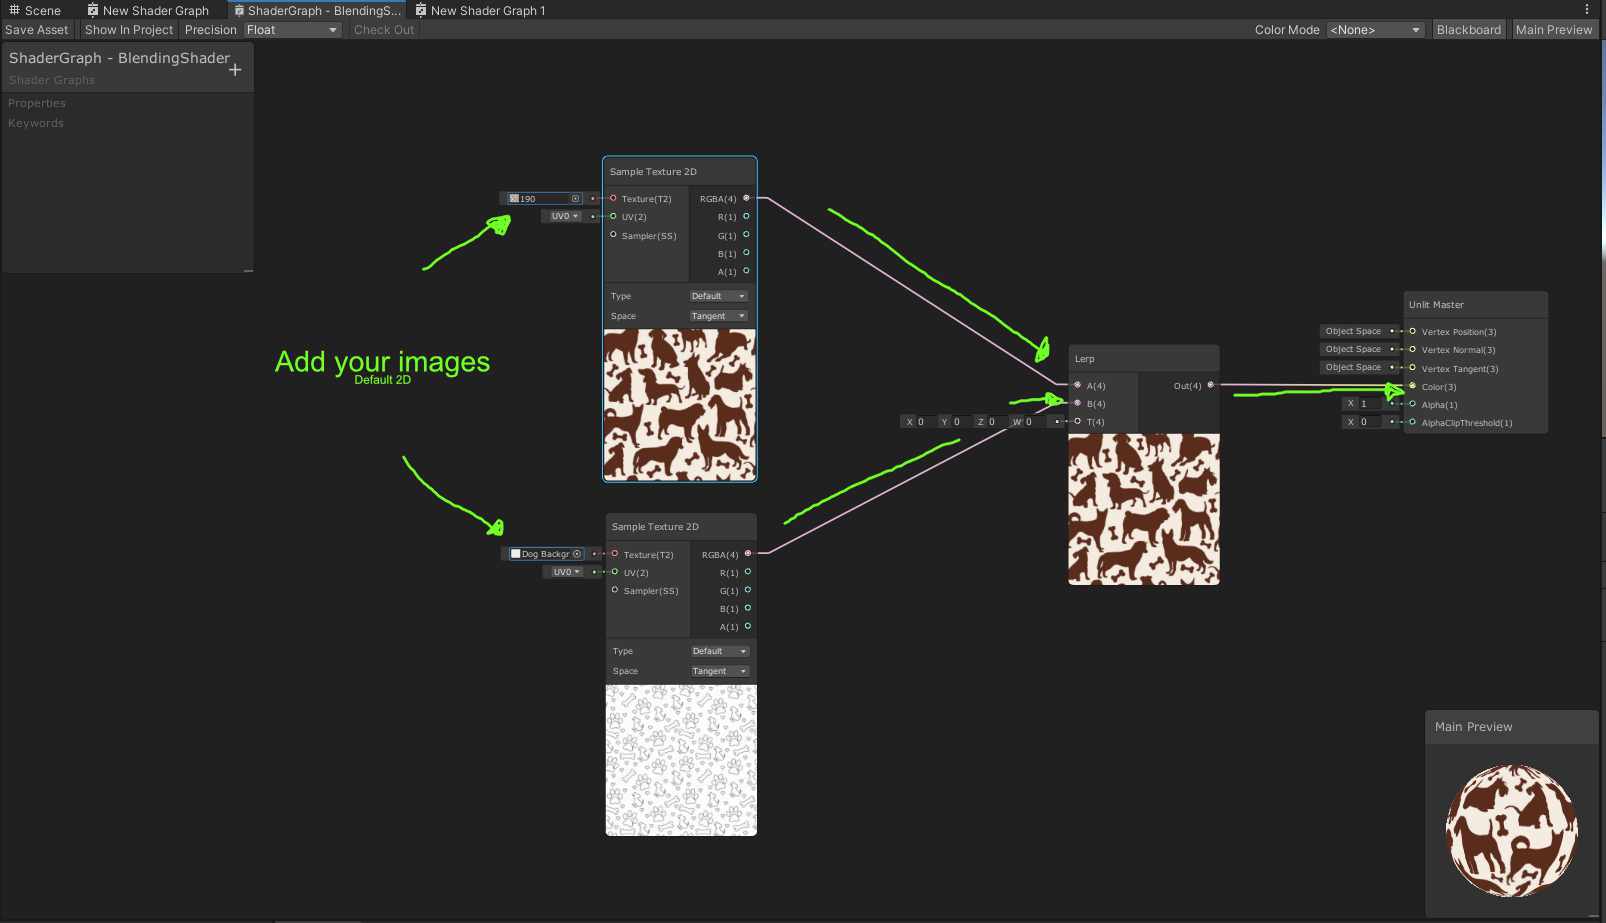
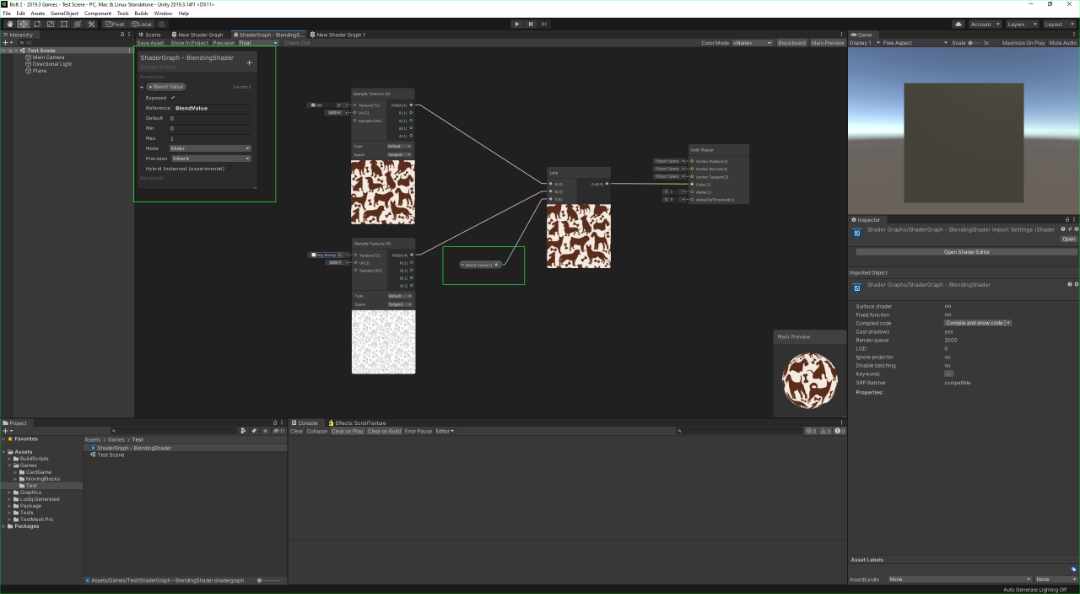
- Time to create a basic blending shader. Press the space bar and search for Sample Texture 2D. Add two of them. Space bar again, and find the Lerp node. Add an image to each of the inputs of the Sample Texture 2D. Take the RGBA values and add them tho the Lerp node.
More info on how these nodes work can be found below. - Now to tackle the T value in the Lerp Node. Via the Shader graphs property window add a vector 1. Give the parameter a descriptive name, i used Blend Value. Change the drop down value for mode to Slider. Now drag the Blend Value into the graph. Connect it to the T value of the lerp.
- In the Project palette right click, create, BlendingMaterial. In the inspector change the shader dropdown to the shader graph you created. Drag this material onto the plane.
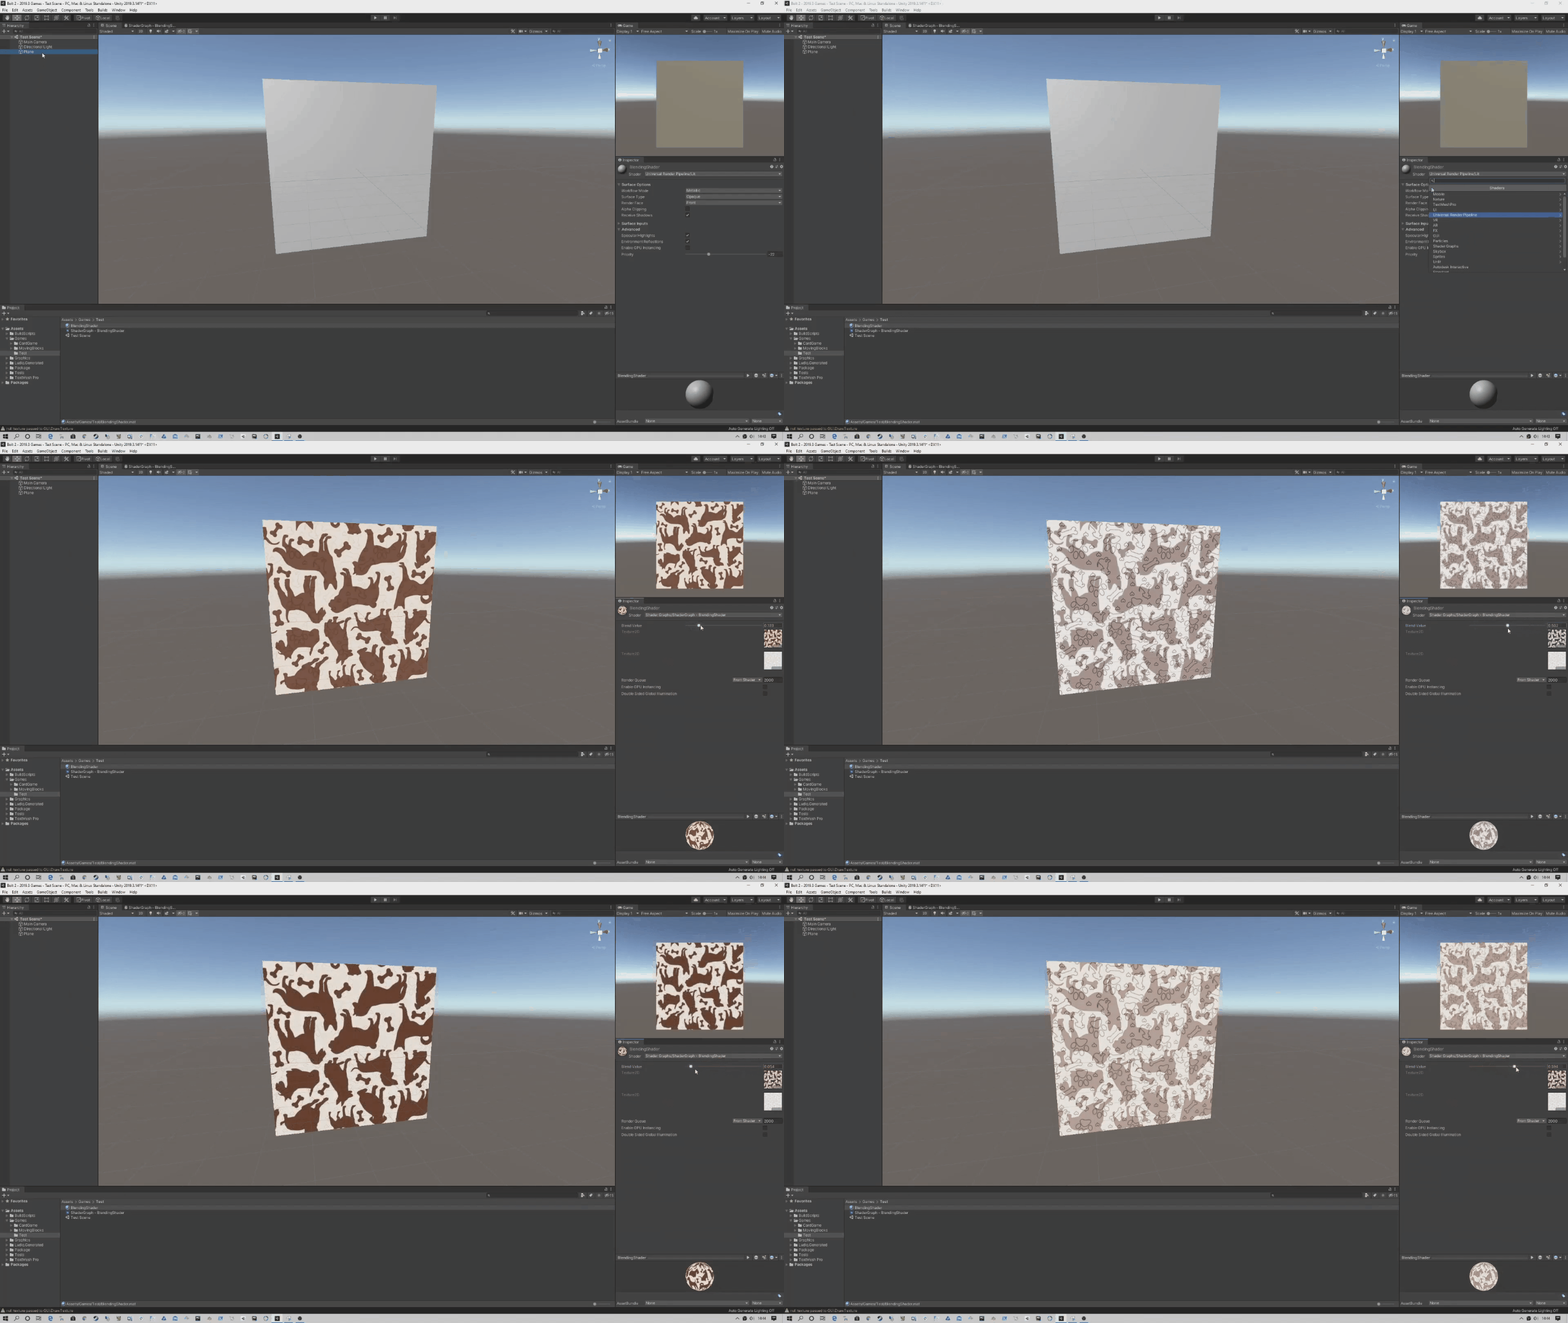
- Select the plane in the heirarchy and in the inspector find the shader. Notice a slider called Blend Value, this is the value you created inside the shader graph. Sliding this value up and down will trigger the lerp to blend between your images.
How do these nodes work?
Sample Texture 2D From the unity docs: Samples a Texture 2D and returns a Vector 4 color value for use in the shader. You can override the UV coordinates using the UV input and define a custom Sampler State using the Sampler input.
Lerp Node - From the unity docs: Returns the result of linearly interpolating between input A and input B by input T. The value of input T is clamped to the range of 0 to 1.
We want to interpolate from one image to the other. The Lerp node can does this by smoothly transition from image to image over T. T is a variable/value that is between 0 and 1.
When the T varoable is set to 1 our first texture will be fully visable. When set to 0 our second image will be fully visable. Changing the variable to a value between 1 and 0 will show both images blended over each other.
